
Singer 3337 Manual: A Comprehensive Guide
Discover the ultimate resource for your Singer 3337! This guide provides detailed instructions, troubleshooting tips, and maintenance advice for optimal sewing performance․
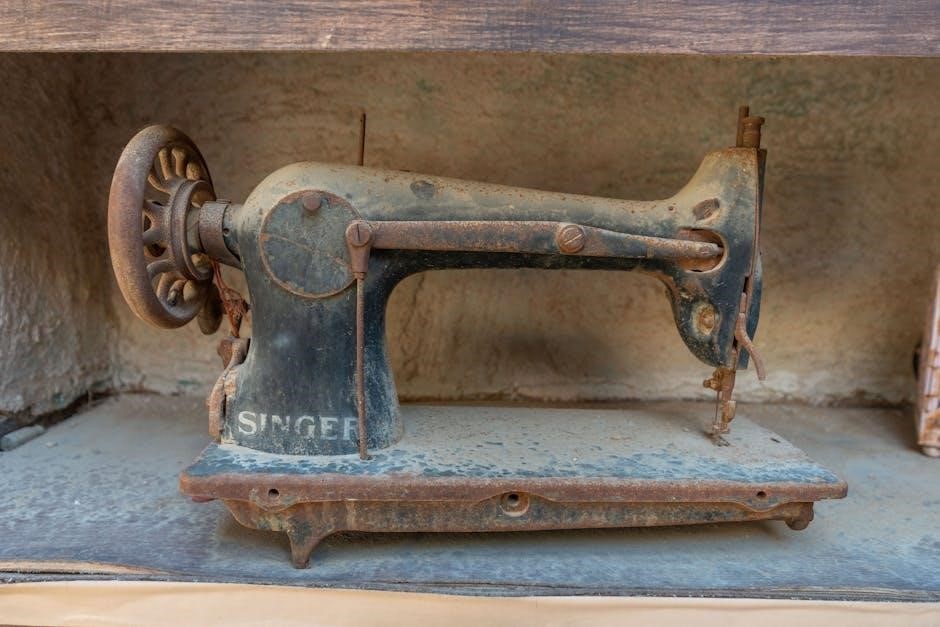
The Singer 3337 is a popular, reliable sewing machine designed for both beginners and experienced sewists․ Introduced as part of the “Simple” series, it embodies Singer’s long-standing tradition of quality dating back to Isaac Singer’s 1851 patent․ This machine offers a blend of essential features and user-friendly operation, making it ideal for everyday sewing projects․
Its straightforward design doesn’t compromise functionality; it boasts a selection of built-in stitches, adjustable settings, and a durable construction․ Whether you’re crafting garments, home décor, or simple repairs, the 3337 aims to deliver consistent results․ Finding a downloadable service manual or owner’s manual is crucial for maximizing its potential and ensuring longevity․ This guide will help you navigate its features and maintain peak performance․
Understanding the Machine’s Features
The Singer 3337 offers a practical set of features for diverse sewing needs․ It includes 33 built-in stitches, encompassing essential options like straight, zigzag, and decorative stitches, catering to various project requirements․ A key feature is the adjustable stitch length and width, providing customization for different fabrics and techniques․
The machine also incorporates a 4-step buttonhole function for creating professional-looking buttonholes with ease․ Its free arm design facilitates sewing cuffs, sleeves, and other cylindrical shapes․ While not as advanced as some models, the 3337’s simplicity is a strength, making it accessible to beginners․ Accessing the owner’s manual unlocks the full potential of these features, ensuring optimal performance and project success․
Initial Setup and Getting Started
Before your first project, carefully unpack your Singer 3337 and ensure all components are present․ Attach the power cord and foot pedal securely․ Familiarize yourself with the machine’s key parts – the handwheel, stitch selection dial, and bobbin winder․
Consult the manual for detailed diagrams․ Begin by winding the bobbin, following the illustrated steps precisely․ Correct bobbin insertion is crucial for proper stitching․ Next, thread the upper thread, again referencing the manual’s threading guide․ Adjust thread tension according to your fabric type․ A test stitch on scrap fabric confirms correct setup․ Proper initial setup guarantees a smooth and enjoyable sewing experience․

Threading the Singer 3337
Master the art of threading! This section details the precise steps for both upper and lower threading, ensuring smooth operation and flawless stitches․
Upper Threading Guide
Successfully threading the upper portion of your Singer 3337 is crucial for consistent stitch formation․ Begin by ensuring the machine is turned off․ Place the spool of thread onto the spool pin, securing it with a spool cap․ Guide the thread through the first thread guide, then down and around the tension disc – this is vital for proper tension control․
Next, lead the thread up and through the take-up lever, ensuring it’s fully inserted․ Continue threading through the remaining thread guides, following the numbered diagram typically found on the machine․ Finally, thread the needle from front to back․ A properly threaded machine will prevent frustrating issues like thread breakage and skipped stitches, allowing for a seamless sewing experience․ Refer to your manual’s diagrams for visual assistance․
Bobbin Winding and Insertion
Proper bobbin winding is essential for smooth sewing with your Singer 3337․ Place the bobbin onto the bobbin winder spindle and press it firmly into place․ Guide the thread from the spool, around the tension disc, and then onto the bobbin, winding in a clockwise direction․ Engage the bobbin winder by pushing the bobbin winder stem to the right․
Once the bobbin is full, it will automatically stop․ To insert the bobbin, open the bobbin case cover․ Insert the bobbin with the thread unwinding in a counter-clockwise direction․ Thread the bobbin thread through the tension spring and out through the slot․ Ensure the thread pulls freely before beginning to sew, preventing tangles and ensuring even stitch formation․
Thread Tension Adjustment
Achieving balanced thread tension is crucial for quality stitches on your Singer 3337․ Begin with the tension dial set to the default ‘4’․ If the upper thread is looping on the underside of the fabric, increase the upper thread tension (higher number)․ Conversely, if the bobbin thread is visible on the top, decrease the upper thread tension (lower number)․
Test your adjustments with a scrap fabric․ Small adjustments are key – a slight turn of the dial can make a significant difference․ Consistent tension ensures even stitch formation and prevents puckering or loose seams․ Remember to re-thread both the upper and bobbin threads if you encounter persistent tension issues․

Basic Sewing Operations
Master fundamental techniques like straight and zigzag stitching with ease! This section guides you through stitch selection, length, and width adjustments for perfect results․
Straight Stitching
Embark on the foundational skill of sewing with the Singer 3337’s straight stitch․ Begin by selecting the straight stitch option on your machine – typically indicated by a straight line symbol․ Ensure you’ve correctly threaded the machine and inserted a suitable needle for your fabric type․
Practice on scrap fabric first! Adjust the stitch length using the designated dial; a shorter stitch is ideal for delicate fabrics, while a longer stitch suits heavier materials․ Gently guide the fabric under the presser foot, maintaining a consistent speed․ Avoid pulling or pushing the fabric, allowing the machine to feed it evenly․
For a neat finish, backstitch at the beginning and end of your seam to secure the threads․ Consistent practice will yield beautifully straight and professional-looking seams․ Remember to always prioritize safety and refer to the full manual for detailed guidance․
Zigzag Stitching
Unlock versatility with the Singer 3337’s zigzag stitch, perfect for finishing raw edges, creating decorative designs, and sewing stretch fabrics․ Select the zigzag stitch setting on your machine – usually represented by a zigzag symbol․ Adjust both the stitch width and length using the corresponding dials․ A wider stitch provides greater stretch, while a longer stitch is suitable for heavier fabrics․

Practice on scrap fabric to determine the optimal settings for your project․ Guide the fabric smoothly under the presser foot, maintaining a consistent speed․ Zigzag stitching is excellent for preventing fabric fraying and adding a professional touch to your creations․
Experiment with different width and length combinations to achieve various decorative effects․ Always consult the manual for specific recommendations based on your fabric and desired outcome․
Adjusting Stitch Length and Width
Master precise control with the Singer 3337’s stitch length and width adjustments․ The stitch length dial determines the distance between each stitch; shorter lengths are ideal for delicate fabrics and increased durability, while longer lengths suit heavier materials for quicker sewing․ The stitch width dial controls the breadth of zigzag or decorative stitches – wider widths create bolder designs and greater stretch․
Always test settings on scrap fabric before starting your project․ A standard straight stitch length is typically around 2․5mm․ Adjust as needed based on fabric weight and desired appearance․ Wider zigzag widths are beneficial for stretch fabrics, preventing breakage․
Refer to the manual for specific recommendations and optimal settings for various stitch types;

Advanced Features and Techniques
Explore buttonholes, zipper insertion, and optional presser feet to unlock the Singer 3337’s full potential for complex sewing projects and creative designs․
Buttonhole Sewing
Mastering buttonholes with your Singer 3337 is easier than you think! This machine features a convenient one-step buttonhole function, simplifying the process significantly․ Begin by selecting the buttonhole stitch on your machine and attaching the appropriate buttonhole foot․
Next, measure the diameter of your button to determine the correct buttonhole size․ Utilize the markings on the needle plate as a guide for accurate placement․ Carefully position your fabric and lower the presser foot․ The Singer 3337 will automatically stitch the buttonhole, including bar tacks for reinforcement․
Remember to practice on scrap fabric first to perfect your technique․ Consistent fabric feeding and proper tension are key to achieving professional-looking buttonholes․ Explore different buttonhole styles offered by your machine for varied project needs․
Zipper Insertion
Installing zippers with the Singer 3337 can elevate your sewing projects! Begin by selecting the appropriate zipper foot – the one designed for sewing close to the zipper teeth․ Attach the foot to your machine․ Position the zipper face down, aligning the zipper teeth with the desired seam allowance․
Slowly stitch along the zipper tape, keeping the teeth aligned and evenly spaced․ For a professional finish, use a coordinating thread color․ When approaching the zipper pull, stop stitching and carefully lift the presser foot to maneuver past it․ Continue stitching down the other side of the zipper․
Practice on scrap fabric to gain confidence․ Consistent speed and gentle guidance are crucial for a smooth zipper insertion․ Explore different zipper techniques for various applications, ensuring a secure and polished result․
Using Optional Presser Feet
Expand your Singer 3337’s capabilities with optional presser feet! A variety of feet unlock specialized sewing techniques․ The zipper foot, as previously mentioned, is essential for neat zipper applications․ An overcast foot prevents fabric fraying, ideal for knit fabrics․ The rolled hem foot creates delicate, professional-looking rolled hems․
Consider the buttonhole foot for perfectly formed buttonholes, streamlining this often-challenging process․ A blind hem foot allows for invisible hems, offering a polished finish․ Each foot attaches easily, snapping onto the presser foot shank․ Experiment with different feet to discover new creative possibilities․
Refer to your Singer 3337 manual for a complete list of compatible feet and their specific uses, maximizing your machine’s versatility․

Troubleshooting Common Issues
Resolve frequent sewing problems with our guide! We cover thread breaks, bobbin errors, and needle issues, ensuring smooth operation of your Singer 3337․
Thread Breakage Problems
Frequent thread breakage can be frustrating, but often has a simple solution․ First, ensure you’re using the correct needle type and size for your fabric weight․ A dull or damaged needle is a primary cause, so replace it regularly․
Check your threading path meticulously; incorrect threading creates excessive friction․ Verify the thread tension is appropriately adjusted – too tight or too loose can lead to breaks․ Also, confirm the bobbin is correctly inserted and wound evenly․
Poor quality thread can also contribute to the issue․ Experiment with different brands․ Finally, inspect the machine for lint buildup, as this can impede smooth thread flow․ Regular cleaning is vital for preventing these problems․
Bobbin Issues and Solutions
Bobbin problems are common, but easily addressed․ If the bobbin won’t wind, ensure the bobbin winder is correctly engaged and the presser foot is lifted․ Check for lint or thread debris obstructing the bobbin case․ A poorly wound bobbin, uneven or too loose, causes tension issues․
If the bobbin thread nests underneath the fabric, re-thread both the upper thread and bobbin, verifying correct insertion․ Inspect the bobbin case for damage or bending; a replacement might be necessary․ Ensure you’re using the correct bobbin type for your Singer 3337․
Regularly clean the bobbin area to prevent lint accumulation․ Proper bobbin winding and insertion are crucial for smooth, consistent stitching․
Needle Problems and Fixes
Needle issues often stem from incorrect needle type or size for the fabric․ Always match the needle to the material – universal for woven fabrics, ballpoint for knits․ A bent or damaged needle causes skipped stitches or thread breakage; replace it immediately․ Ensure the needle is fully inserted into the needle clamp, with the flat side facing the correct direction․
If the needle breaks frequently, check for obstructions in the needle plate area․ Verify the presser foot pressure is appropriate for the fabric; excessive pressure can strain the needle․ Incorrect threading can also lead to needle breakage․
Regularly inspect the needle for burrs or damage․ Using a high-quality needle designed for your Singer 3337 is essential for reliable performance․

Maintenance and Care
Preserve your Singer 3337’s longevity with regular cleaning and lubrication! Follow the recommended schedule to ensure smooth operation and prevent issues;
Cleaning the Singer 3337
Regular cleaning is crucial for maintaining your Singer 3337’s performance․ Always disconnect the power supply before beginning any cleaning procedure․ Use a soft brush to remove lint and dust from the bobbin area, feed dogs, and around the needle plate․ A small vacuum cleaner with a brush attachment can also be helpful for removing stubborn debris․
Wipe down the exterior of the machine with a slightly damp cloth․ Avoid using harsh chemicals or abrasive cleaners, as these can damage the finish․ For hard-to-reach areas, a cotton swab dipped in rubbing alcohol can be used carefully․ Remember to clean the machine after each use, or at least frequently, to prevent lint buildup which can cause malfunctions and affect stitch quality․ Proper cleaning extends the life of your sewing machine!
Lubrication Guide
Proper lubrication ensures smooth operation of your Singer 3337․ However, avoid over-lubrication, as this can attract dust and lint․ Only use sewing machine oil specifically designed for this purpose․ Apply a small drop of oil to the bobbin race, the needle bar, and the motor shaft access points – consult your manual for specific locations․
Do not oil the tension discs or feed dogs․ Run the machine briefly after oiling to distribute the lubricant evenly․ Regular oiling, typically every few months with moderate use, prevents friction and wear․ Always disconnect the power before lubricating․ Refer to the owner’s manual for detailed diagrams and instructions to ensure correct application and maintain optimal performance․
Long-Term Storage Tips
Preparing your Singer 3337 for long-term storage requires careful steps․ First, thoroughly clean the machine, removing all lint and dust․ Lightly oil key components – bobbin race, needle bar – to prevent rust․ Cover the machine with a dust cover or place it in its original box․
Store it in a cool, dry place, away from direct sunlight and extreme temperatures․ Avoid damp environments․ Loosen the belt slightly to prevent it from cracking․ Remove the needle and store it separately․ Periodically check the machine during storage to ensure no issues arise․ Proper storage extends the life of your Singer 3337․

Resources and Support
Access online manuals, official Singer website support, and replacement parts easily․ Find expert assistance and warranty information for your 3337 model․
Downloading the Manual Online
Locating your Singer 3337 manual online is remarkably straightforward, offering immediate access to a wealth of information․ Many websites archive older manuals, providing downloadable PDF versions for convenient offline viewing․ The official Singer website itself is a primary resource, often hosting manuals for current and discontinued models, including the 3337 Simple․

Alternatively, various sewing machine enthusiast forums and communities frequently share links to downloadable manuals․ A quick internet search using terms like “Singer 3337 manual PDF” will yield numerous results․ Be sure to verify the source’s credibility before downloading to ensure you receive a legitimate and virus-free file․ These digital copies are invaluable for quick reference during projects or when troubleshooting issues, eliminating the need to physically store a paper manual․
Singer’s Official Website Support
Singer’s official website provides extensive support resources for the 3337 model and all their machines․ You can typically find downloadable manuals, frequently asked questions (FAQs), and troubleshooting guides specifically tailored to address common issues․ Their support section often includes helpful videos demonstrating various sewing techniques and machine maintenance procedures․
Furthermore, Singer offers a dedicated customer service team accessible through phone or online chat․ This allows users to directly address specific concerns or seek personalized assistance with their 3337․ The website also features a section for machine updates and stitch guides, ensuring your sewing experience remains current and optimized․ Utilizing Singer’s official support channels guarantees access to accurate and reliable information directly from the manufacturer․
Finding Replacement Parts
Locating replacement parts for your Singer 3337 is crucial for maintaining its longevity and functionality․ Singer’s official website often features a parts store where you can directly purchase components like needles, bobbins, presser feet, and belts․ Alternatively, numerous online retailers specialize in sewing machine parts, offering a wider selection and competitive pricing․
When searching, having your machine’s model number (3337) readily available is essential for ensuring compatibility․ Websites like SewParts․com and eBay are popular options, but always verify the seller’s reputation and return policy․ Local sewing machine repair shops can also source parts and provide expert advice on identifying the correct replacements for your Singer 3337․